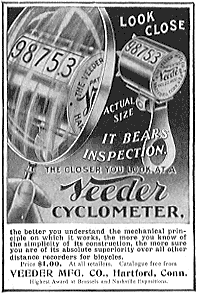
 ad from Harper’s Magazine more old ads |
If you have a bumper-mount car rack for carrying your bikes (the type with two arms that protrude), use it as a repair stand. Rest the bike on the uprights and it’ll be at the perfect height for making adjustments. On some racks you’ll even be able to pedal to adjust the derailleurs. BACK When rounding up your tool kit, don’t think you need beautiful matched wrenches and screwdrivers. Often odd flea market tools and things you find around the house can work just fine for basic bike repairs. And there’s an advantage to having these in your collection: they make it easier to find the right tool when you’re searching through a tool box or your work bench because they look different. BACK Want a great toolboard over your workbench? Do this: cut a piece of cardboard out of a bike box (or?) the size of your toolboard (3/4-inch plywood screwed to the wall works nicely). Lay the cardboard down on the bench or floor and lay all your tools out on it the way you’d like them to hang. Put frequently used tools near the center and don’t put tools too high or you’ll have trouble reaching them. Next, draw a quick outline around the tool and mark where a nail would support the tool. Remove the tools, rest the cardboard against your toolboard, drive nails through the marks you made, remove the cardboard template and hang your tools on the nails (use the outlines on the template as your guide). They should be organized exactly the way you planned. Try the arrangement and if you like it, use a Sharpie marker to outline the tools and you’ll have completed your custom toolboard. Hints: you can reuse the toolboard template so don’t throw it away. For a screwdriver and Allen wrench rack, just drill some holes in a section of 2 x 4 stock and screw it to your toolboard. BACK This tip is from Jeff Gilmore of the Third Hand: To do a nice job cutting down mountain bike handlebars, all you need is a simple hose clamp, one of those constricting clamps you can buy for $1.50 at any hardware store. Mark the bar where you want to cut (careful, better to remove a little and try it than to ruin the bar by cutting too much) and tighten the hose clamp on the bar so the outside edge rests right on the cut line. By resting your hacksaw against the edge of the hose clamp and sawing carefully, you can cut the bars as neat as can be. Use a little emery cloth or sandpaper to smooth the rough edges. BACK The most common cause of poor shifting on today’s bikes that click with each shift, is a stretched cable. When the cable has slack in it, one click of the lever can’t move the derailleur far enough to push the chain onto the next cog. Fortunately, derailleurs have small adjustment barrels on them designed to be hand turned (look where the housing meets the derailleur). And it’s easy to remember which way to turn them. If the derailleur is hesitating shifting toward the spokes (the most common affliction); turn the barrel toward the spokes in 1/2-turn increments until the shifting occurs with each click. Take the opposite approach if the derailleur is hesitating shifting away from the spokes. BACK Next time your hands are all grimy, squeeze a little orange juice on them and rub. It won’t get them spotless but it does a pretty nice job of cutting grease for something you can eat. BACK If you keep your chain in good condition, your cassette cogs and chainrings will last longer, which will save you money and prevent shifting glitches. To tell how your chain is holding up, measure it. Take a ruler and try to measure exactly 12 inches between any two pins. If the chain measures 12 1/8 inches or more, it’s worn out and should be replaced. If it’s really worn, you’ll probably need to replace the cassette as well—or a few worn cogs if you are lucky enough to be able to find someone who sells individual cogs. BACK An easy way to remove mountain-bike handlebar grips, even ones seemingly bonded to the bar, is to slide a long thin screwdriver beneath the grip, lift it, drip a little isopropyl alcohol under the grip and twist. The alcohol will work its way beneath the grip, simplifying removal. To reinstall, drip some alcohol inside the grip and swish it around (hold your finger over the hole in the end if there is one). Then slip on the grip. The alcohol will evaporate quickly, and as soon as that happens, the grip will be secure. BACK Ever grab your bicycle and stick yourself on a frayed cable? Ouch, that smarts! Avoid the pain and also protect your cables, which can weaken and slip if they fray, by always installing a cable end after cutting them (cables ends are also known as cable caps; they’re small aluminum ends that slips over and seal the cable stopping fraying). You can pick these up at any bicycle shop for cheap. I like to crimp them on the ends of the cable with a diagonal cutter so they can’t come off. If you don’t have cable ends, there are many alternatives, such as super glue, spoke nipples, heat-shrink electrical tubing, a small section cut from a ballpoint pen refill, and you can also solder many cables simply by heating with a match or lighter and touching with solder. Use your creativity and save your cables and yourself. BACK |
