![]()
Click to enlarge
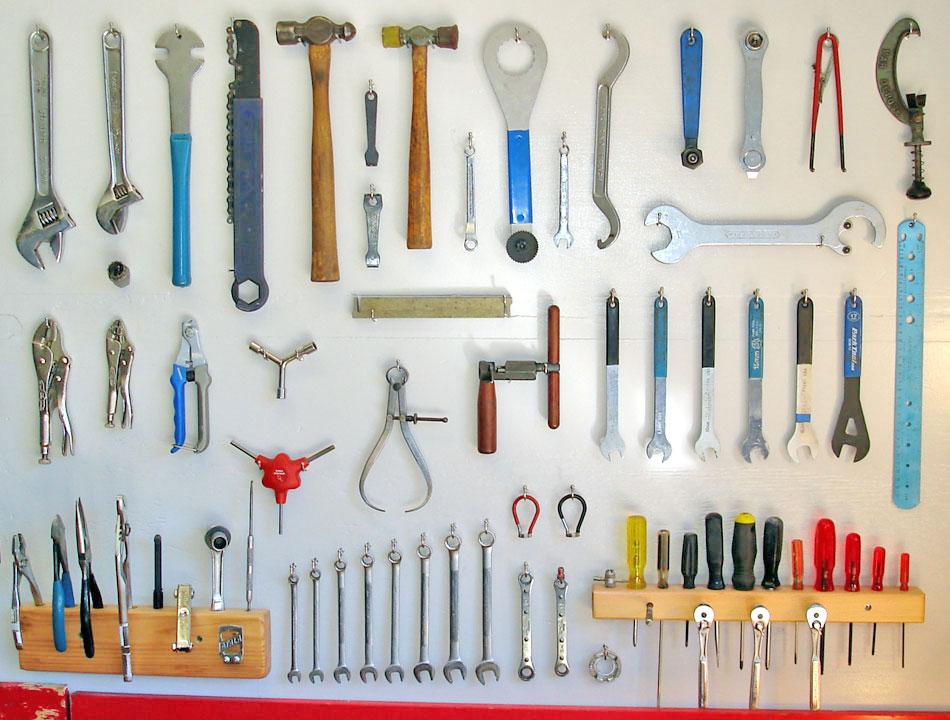
Toolboards are personal things. Mine reflects the bicycles I maintain, the tools I like most and a design that works for me and my workshop. I try to place the most frequently used tools closest and design the board so that the tools are within easy reach. I don’t want to have to move too far from the bicycle repair stand or stand on my toes to reach a tool. I also don’t want too many tools on my board because it only spreads the tools further apart and makes it more difficult to find tools, which slows you down. I keep my cutting and milling tools in drawers to protect the sharp edges, and also because they’re not used as often as the basic hand tools, so it’s no biggie to open a drawer to get them.
I’ve used finishing nails in the past for my toolboards and they work fine. This time I tried something different, little screw-in ball-end stainless-steel hooks. It’s not as easy to get the tools off them, but they sure look nice and I think I won’t mind taking a little more care when reaching for tools. This is a new plier tools arrangement for me, too. I typically mount each plier tool to the board separately; however, this new approach makes them much more accessible because one handle is free and easy to grab. The 2 x 4 rack also provides a superior way to hold the ratchet, 8mm Allen and tape measure (it’s missing from the photo; it clips to the Atala headlight bracket).
A good way to make your own toolboard is to pick up a bike box at a shop. Cut one side off it and lay it on the ground. Take all the tools you want on your finished toolboard and lay them out carefully on the cardboard. Move them around until you have them just the way you want them. Then you can trace around them with a Sharpie marker. You now have a handy template, which you can hold against your plywood. Simply drive nails through the tracings right where the nails will support the tools, pull the template off and hang your tools. Have fun!
Oh, if you’re wondering, those three small ratchets on the right 2 x 4 hold a 4, 5 and 6mm Allen wrench. The little gizmo protruding to the left of them is a combination magnet/screw holder and the T-shaped item left of the yellow screwdriver is a valve tool.
Finally, people ask why I don’t outline my tools on the toolboard. This is a common technique in shops where many people use the toolboards. It helps at the end of the day when you want to do a quick inventory and make sure every tool is back in place and it helps non-mechanics put the tools back in the right place. In a home shop, you get used to where your tools belong and you don’t really need to outline them. Also, not having outlines is good motivation to return the tools as you work, which keeps your workbench clean and makes it easier to find the tools when you need them. Quick tip: if you look high and low and simply can’t find the tool, check your apron pocket. Without tool outlines, toolboards look cleaner, too, and I like that. It’s the same reason I don’t use pegboard for my toolboard. I find all those holes distracting compared to simple plywood.
On this webpage you can see pictures of the beautiful toolboard of world-renowned professional mechanic Pietro Piazzalunga (and read a fascinating interview with him, too).
