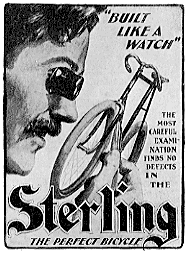
 1898 Sterling Cycle Works (Chicago) ad from Harper’s Magazine more old ads |
Go to my basic bicycle care and maintenance article. Many people forget which way to turn to loosen and tighten things. Almost all bicycle parts are tightened by turning to the right and loosened by turning to the left. One way to remember this is to recite, “Righty, tighty; lefty, loosy.” Don’t ask me who made this up—but it works. Exceptions: The left pedal on all bikes is reverse thread meaning you must turn it clockwise to remove it. Another oddball part is the right bottom bracket cup (chainring side) on most modern bikes built in China/Taiwan/Japan/USA. This cup is also reverse thread so you must turn it clockwise to loosen. BACK The best place to store a bike is inside. Shelter will protect it from thieves and the weather. Left outside, a good bike can rust and corrode to dangerous condition in less than a year. This is especially true if you live near the ocean where salt in the air is super corrosive. If your apartment is small, simply install a bike hook and hang your bike from a wheel. These hooks are cheap (about $3 at hardware and department stores) and they’ll screw into any wood wall or stud in a plaster/sheetrock wall. Be creative: maybe you can hang your bike in a stairwell or a closet; above your bed (cool!) or in the kitchen? You can find a spot if you look a bit. Take it from a guy who once stored six bikes in plain view in a 900-square-foot apartment (to my wife’s dismay). BACK Bicycle tires lose air slowly. It’s just their nature. Because they don’t hold a lot of volume of air and because a significant amount of that air can seep out over a relatively short period of time (a week for a road bike tire and about two weeks for a MTB knobby), there’s a risk if you just ride without checking the tire pressure. If you bike on soft tires and you hit a pothole, rock or other obstacle, it’s possible to damage or ruin, the tire, tube and worst of all, the rim. A too-soft tire also means that you’re working a lot harder and on a mountain bike, it can make for a wobbly, hard-to-handle ride. So, be smart and check your tire pressure regularly: every week during the season for mountain bikes and before every ride for roadsters. If you hit a hole on your soft tire and flat, here's help. Read my flat tire tips too. BACK Most people put too little pressure in road tires and too much pressure in off-road rubber. Road tires usually take from 95 to 125 pounds per square inch (psi). If you weigh less than 150 pounds, go toward the lower end and vice versa. For mountain tires intended for off-road use, a good range is from 35 to 45 pounds. Use the same rule for weight. With off-road rubber, you’ll find that less air means a softer ride and improved control because the tire has a larger footprint on the trail. Here's a funny look at over-inflation. BACK Carry your bike on a trunk- or bumper-mount car rack? Beware the exhaust pipe! It’s easy with these racks to mistakenly place the bicycle in such a way that the tire is near the exhaust. Then, as you drive, the hot exhaust can actually melt your tire, which will ruin it beyond repair. Always take the time to mount the bicycle so that the tires are well clear of the exhaust pipe. BACK Prevent getting dirt in the important drivetrain components on your bicycle by always laying it down on its left side. BACK On any bike with derailleur gears (bikes with multiple sprockets on the front and/or back), there are two gears that you should ride in rarely if at all. These are called crossover gears because when the bike is in these gears, the chain crosses over from the extreme left or right on the front to the extreme right or left on the rear. In these positions, the chain is most likely to wear the cogs in back and chainrings in front and it’s most likely to make noise and miss-shift. So, pay attention and try not to shift into the large chainring/large cog and the small chainring/small cog combinations. BACK A good way to end those embarrassing black marks you may find on your legs after every ride is to teach yourself to put your left leg down at stops. This way, the leg that’s down is on the wrong side to touch the chain and other drivetrain parts. Keep your chain clean, too. BACK Squeaking sounds when you’re pedaling indicate unnecessary wear and tear on your drivetrain and the noise almost always comes from a dry chain. If you look at the chain and see bright, shiny links, you’ve waited too long to add lube. Always try to keep a thin film of lube on the chain and you’ll prevent rust, squeaks, poor shifting and premature drivetrain wear. Lubing the chain like this is one of the easiest bicycle repairs you can perform! BACK The most common cause of saddle discomfort is an improperly adjusted seat. Start with the seat level with the ground and only tip it from 2 to 3 degrees up or down if you think it will help ease discomfort. Don’t make the mistake of angling it steeply downhill. This makes you slide forward putting too much weight on your knees and hands. BACK If the seat is adjusted correctly and it still bothers you, it could be many things. Have you tried a good pair of cycling shorts? These include padding and they’re worn without underwear so that there are no seams and only comfortable padding inside between you and the seat. Another possibility is that you haven’t conditioned your butt to riding. It usually takes a few weeks of regular riding to get used to sitting on a bike seat. If these steps fail, it’s probably a bad seat. Visit a shop and try other seat designs until you find one that feels great. Gel seats are very popular but there are plenty of designs to try. BACK Don’t make the mistake of riding without a simple bicycle repair kit. You need a pump that attaches to your bicycle and a small seat bag you can strap beneath the seat. In this bag, put a spare tube (same size as what’s on your bike), tire levers (use them to remove the tire), patch kit (in case you get two flats), and a mini bike tool and perhaps some cash, just in case. Even if you don’t know how to use the stuff, the kit can come in handy because a cyclist might come along and help you out (other cyclists love to lend a helping hand). BACK Sooner or later your chain will fall off the front sprockets while you’re riding. On most bikes, to get it back on, all you have to do is shift it on by moving the left shift lever as if you were shifting onto a bigger chainring. Pedal lightly and finesse the chain back into place. This will spare your hands a serious dose of chain grease. If the chain drops when you’re climbing, head down hill for a bit, shift the chain back on and turn back. BACK Here’s the foolproof way to park your bike against a pole: Rest the side of the seat against the pole. Then backpedal the pole side pedal until it comes up (to about 12 o’clock) and touches the pole. Voila! The concave in the side of the seat keeps the bike from rolling forward and the pedal keeps the bike from rolling backward. So, short of an earthquake, the bike won’t slide, fall over, and get all dinged and dented. BACK Noises driving you batty when riding? A common source of clicks and creaks is the pedal cleat. Try spraying ArmorAll or rubbing some paraffin on plastic cleats to silence the annoying noise. If they’re metal cleats, apply a little grease (but remember to remove your shoes before walking into your carpeted living room). A loose crankarm can also creak. Tighten its bolt and the noise should end. BACK |
|
